Introduction
Creating and managing content can often feel like juggling multiple tasks at once. For bloggers and developers who utilize both Notion and Webflow, SyncFlow offers a seamless solution to synchronize content without the hassle of manual updates. Whether you're a seasoned web developer or a content creator, learning how to publish Notion blog posts directly to Webflow CMS can streamline your workflow and enhance productivity.
Why Use SyncFlow?
SyncFlow bridges the gap between Notion’s versatile writing platform and Webflow's powerful CMS, allowing you to auto-sync content effortlessly. Here’s why this tool is a game-changer:
- Auto-Sync: Automatically update your Webflow site whenever changes are made in Notion.
- Versatile Field Types: Supports a variety of field types including text, images, and more.
- Customization: Notion elements can be styled directly or using classes in Webflow.
- Real-Time Synchronization: Ensures your site is always up to date with the latest content.
For more information on setting up SyncFlow and the features it offers, you can visit SyncFlow's official page.
Step-by-Step Guide to Sync Notion with Webflow CMS
Follow these simple steps to start syncing your Notion blog posts with Webflow CMS using SyncFlow.
1. Install SyncFlow
Begin by heading to the SyncFlow website and clicking on 'Get Started'.
2. Grant Access
- Webflow: Approve and grant SyncFlow access to your Webflow sites.
- Notion: Connect your Notion account and select the pages or folders to sync.
3. Set Up Your Account
Sign in to your existing SyncFlow account or create a new one.
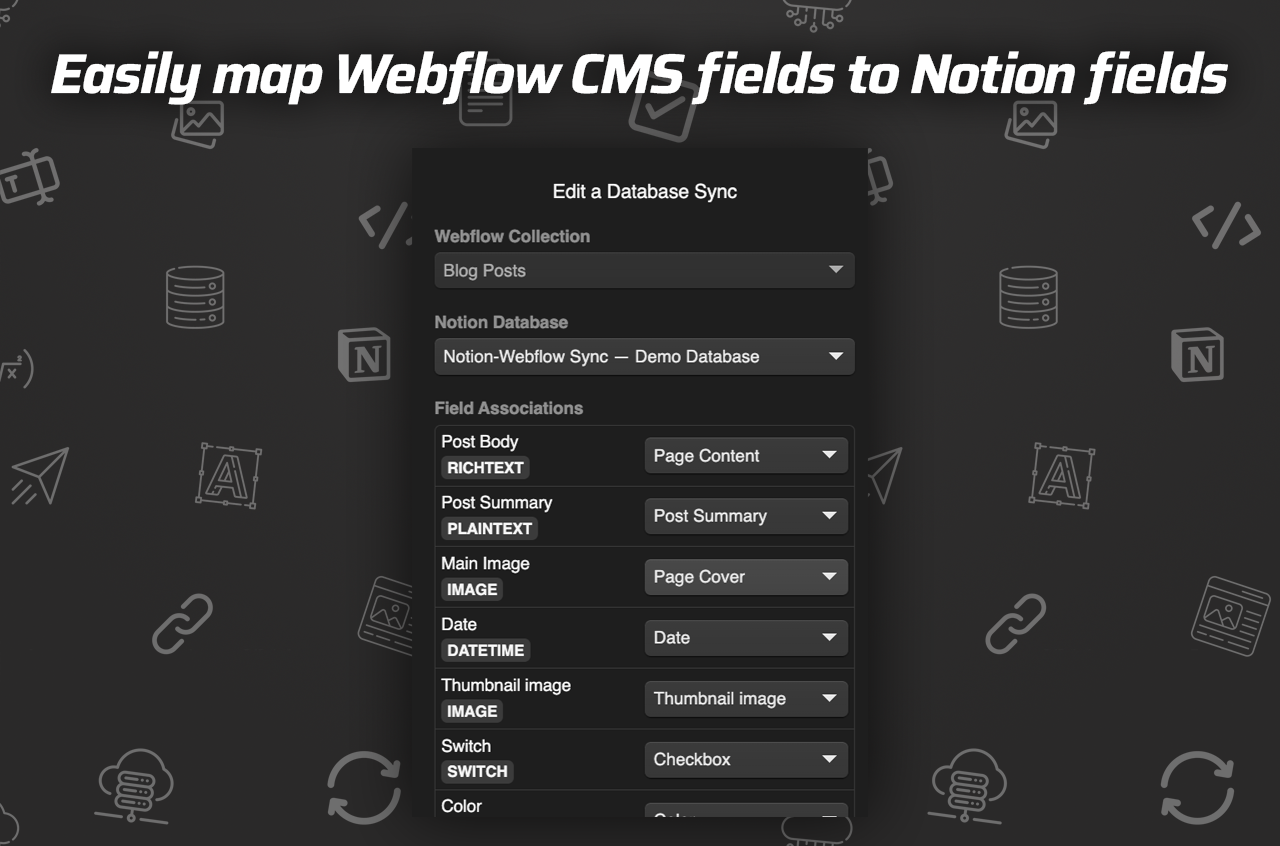
4. Configure Field Mapping
Map the Webflow CMS fields to Notion fields for seamless data flow. Customize your settings to choose how each field should sync.
5. Create a Sync Task
- Click on 'Sync a new database' in the SyncFlow dashboard.
- Select the desired Webflow collection to match with your Notion database.
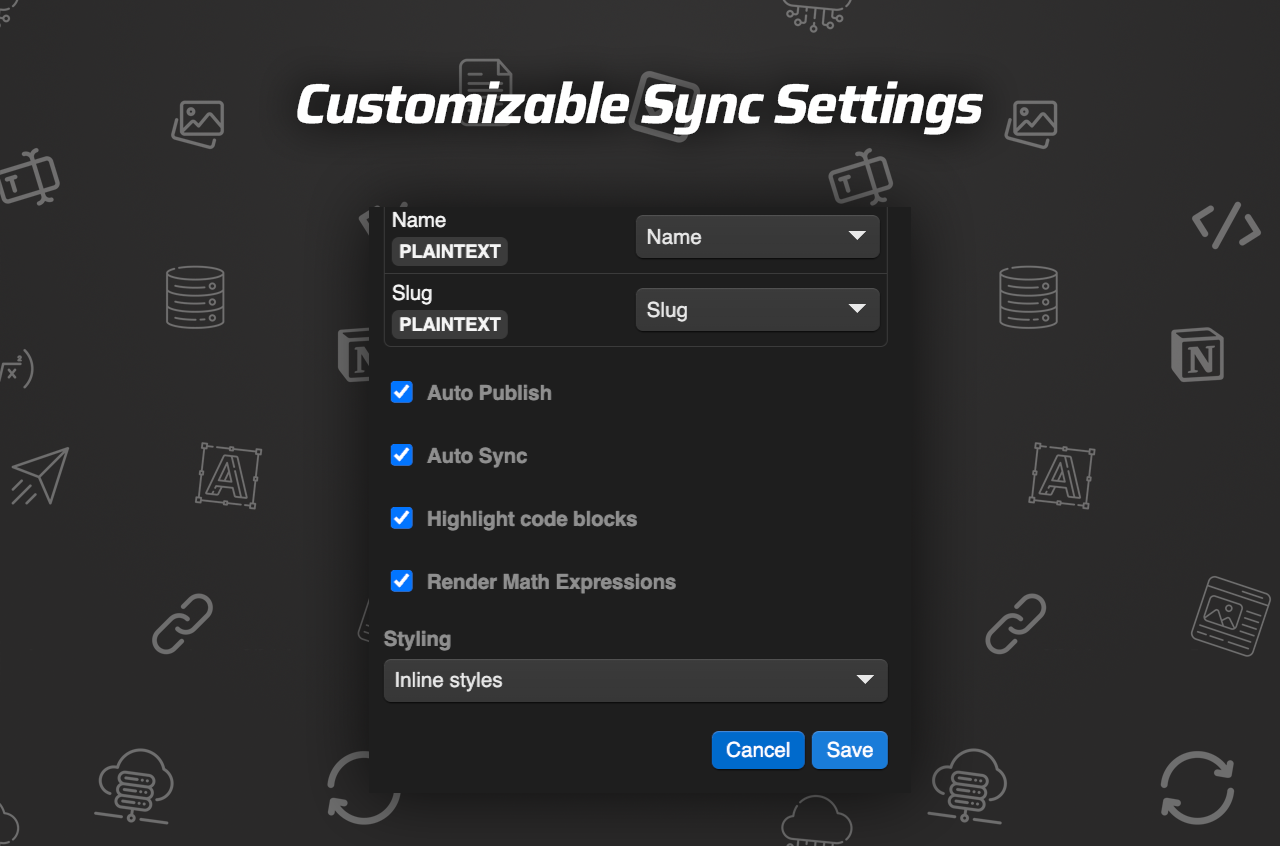
6. Adjust Sync Settings
Tailor your sync options, such as enabling ‘Auto-Publish’ for automatic updates and configuring styling preferences.
7. Save and Verify Sync
Save your settings, add a test entry in Notion, and verify if it appears in the Webflow CMS.
Optional: Full Resync
For already existing databases, you can choose the full-resync option to ensure complete data matching.
Video Tutorial
For a complete visual guide on setting up SyncFlow, refer to this comprehensive tutorial video:
Benefits of Using SyncFlow
- Efficiency: Reduce the time spent on manual updates across platforms.
- Consistency: Maintain a consistent brand message and style across all channels.
- Flexibility: Adapt field types and styling to best suit your needs.
- Accuracy: Ensure data accuracy between Notion and Webflow with automated updates.
By integrating SyncFlow into your workflow, you can focus more on content creation and less on tedious synchronization tasks.
Conclusion
SyncFlow revolutionizes how you manage and publish content by seamlessly bridging the gap between Notion and Webflow. Whether you’re a freelancer or a large team, implementing this system can optimize your productivity immensely.
Start syncing your success today with SyncFlow and transform your content management experience.
Embrace the future of content management by seamlessly integrating your Notion creations with Webflow CMS through SyncFlow. Happy publishing!
Comments
Post a Comment