
If you need a Framer downloader that gives you a static copy instead of another design-only workflow, the cleanest path is to export the site and host it somewhere you control. That is exactly the kind of job ExFlow.site is built for: paste in a Framer URL, choose what to export, and get a portable set of HTML, CSS, JavaScript, images, and pages.
In practice, this is useful when you want to keep a site portable, hand it off to another team, or move away from hosting that no longer fits your budget or workflow. It is also a better fit than a one-off rebuild when you already like the design and just need the site to live independently.
What you will learn: how to choose the right export settings, what to check in the downloaded files, and how to pick a hosting route that matches your team.
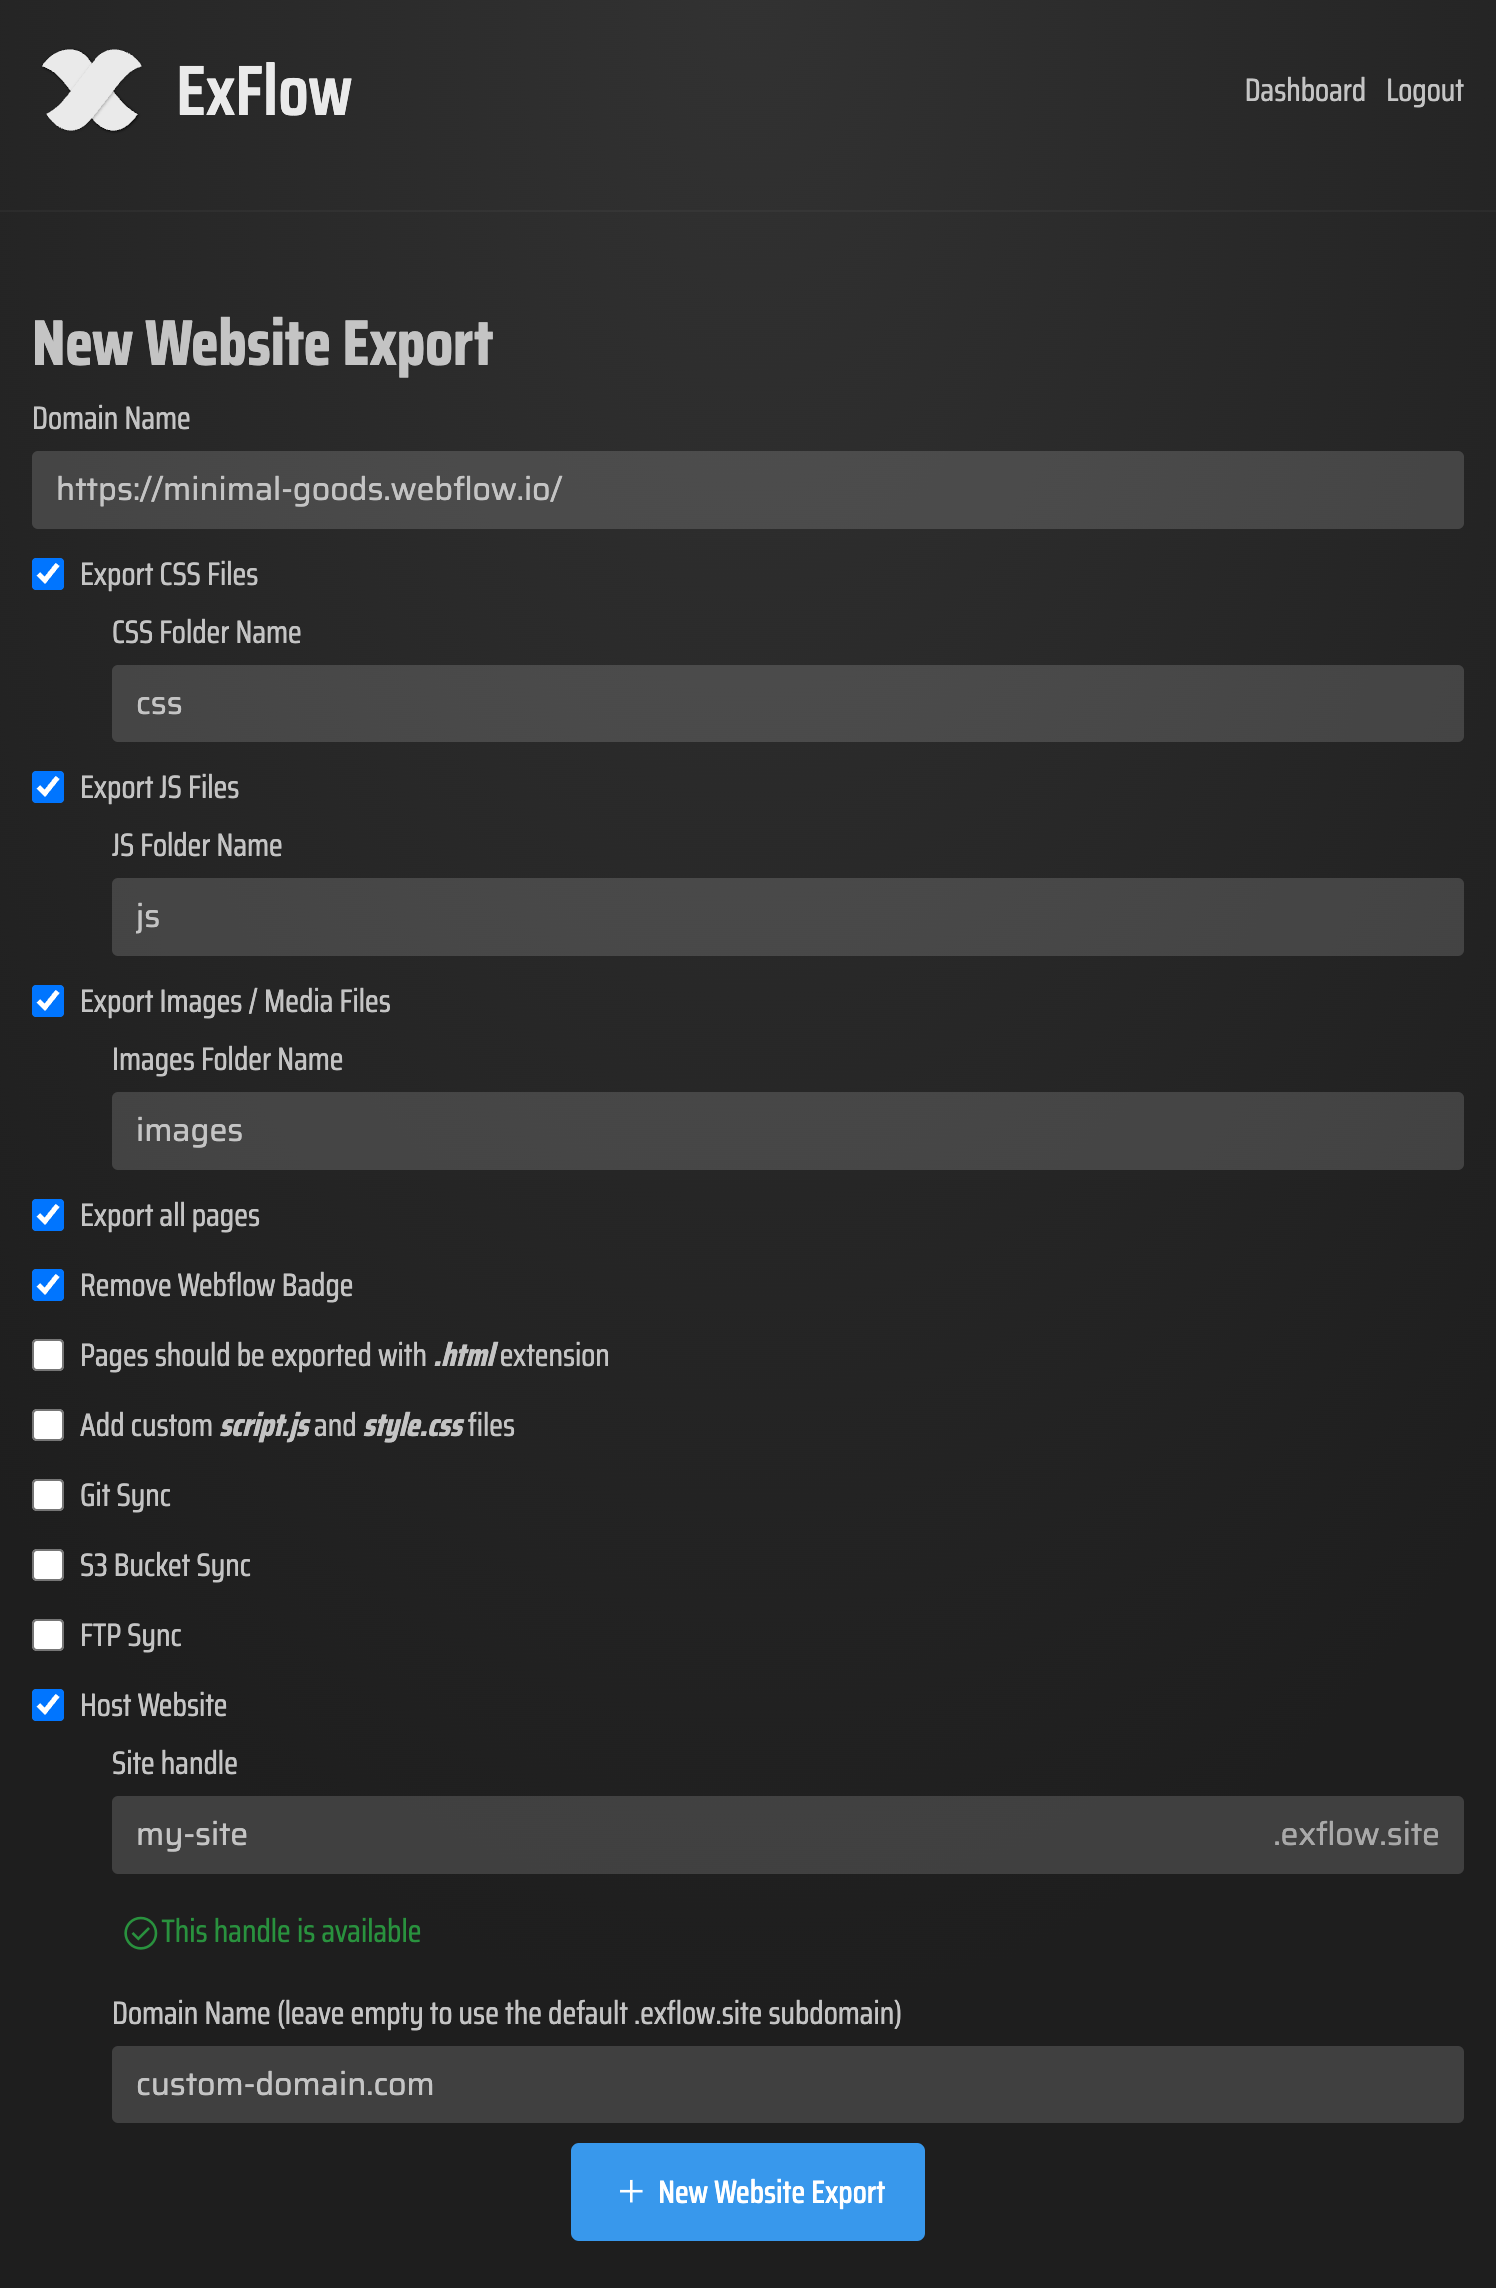
The first decision is the export shape you actually need. For most marketing sites, I care about the full page set, CSS files, JavaScript files, and copied media. ExFlow supports those options directly, along with controls for exporting all pages, removing the Made with Framer badge, and adding custom script or style files when needed.
Start With The Output You Want
I have seen Framer exports go sideways when the team treats them like screenshots instead of real site files. A useful export should still feel like a website after it leaves the editor. That means page structure, asset paths, and navigation need to survive the trip.
For that reason, I usually export with a simple checklist in mind:
- All pages included, not just the homepage.
- CSS and JavaScript copied into the bundle.
- Images and media files preserved.
- Custom scripts and styles available if the site depends on them.
- Clean HTML files that can be hosted anywhere.
That is also why a Framer exporter is more useful than a generic downloader. You are not just trying to archive the design. You are trying to preserve a working static version of the site.
Once the settings are right, the workflow is straightforward: enter the URL, choose the export settings, and download or sync the result. If you are managing multiple sites or want a repeatable process, this is much easier than rebuilding the same pages by hand in another platform.
Check The Exported Files Before You Publish
After the export finishes, I like to inspect the folder before the site goes live. That is the moment to catch missing assets, broken internal links, or a page that did not export the way you expected.
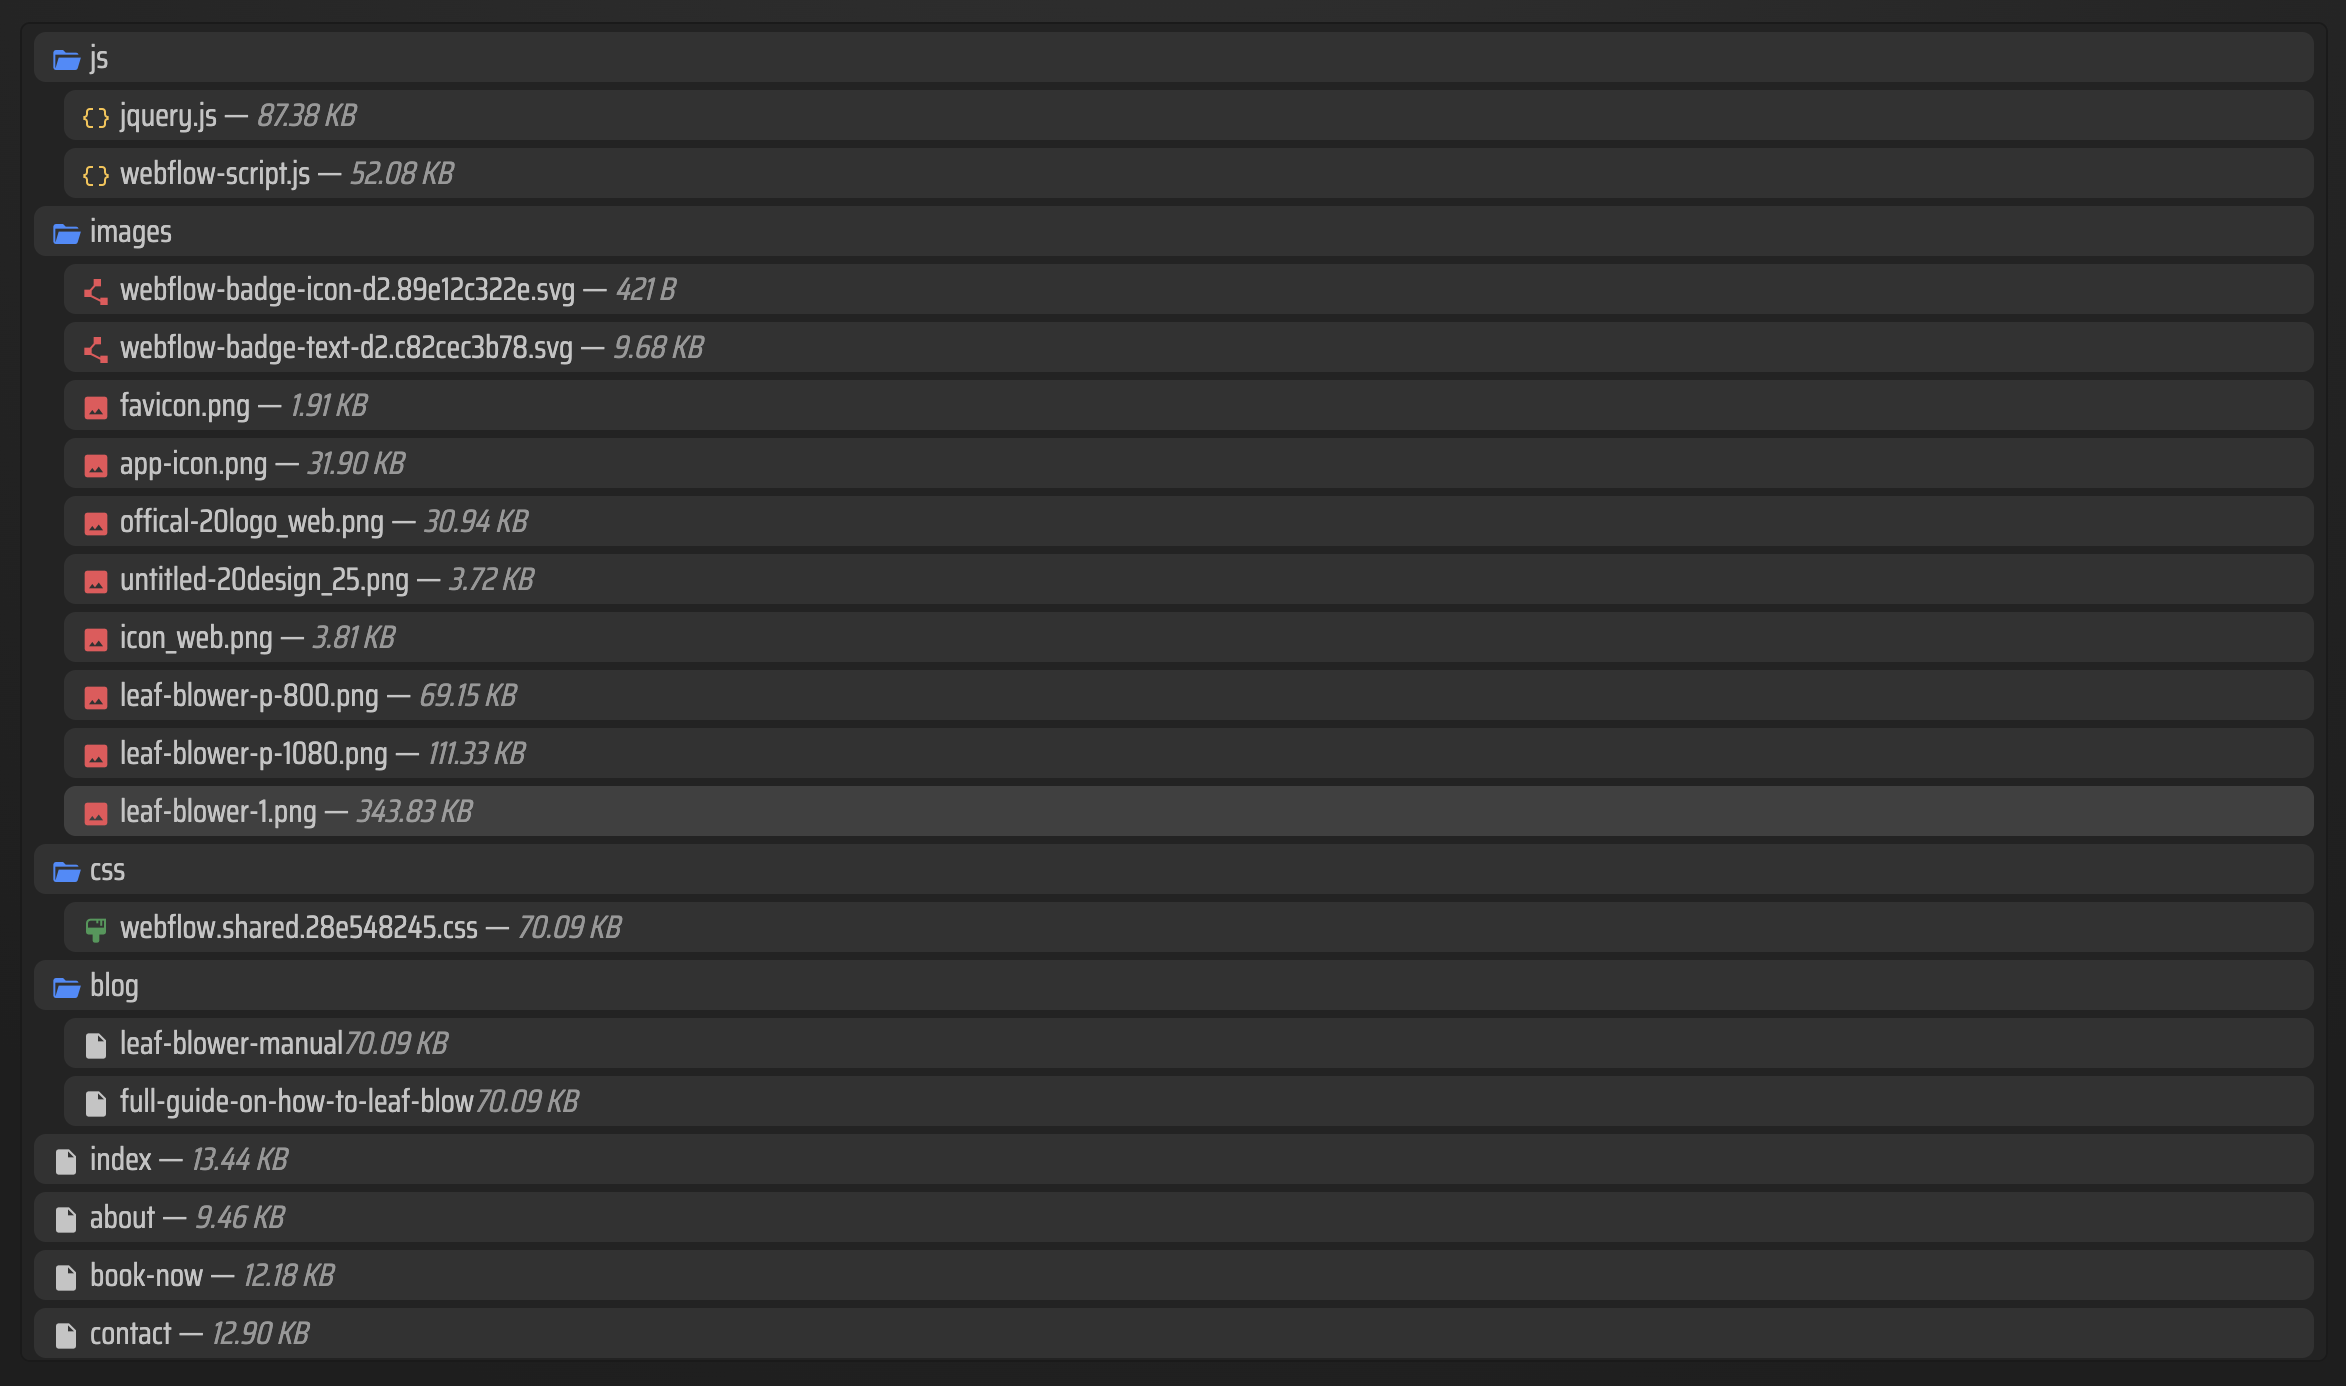
A healthy export should look like a real static site, not a loose pile of assets. The folder should give you confidence that you can host the result on your own terms, whether that is a custom server, object storage, or a Git-based deployment flow.
The extra check matters most when the original site uses animations or layered components. You want to confirm that the exported output still behaves like the original site from a reader's point of view, not just from a file structure point of view.
Pick The Hosting Route That Fits Your Team

ExFlow gives you a few practical hosting choices. You can host the exported site through ExFlow itself, or sync the files to Git, S3, or FTP if your team already has a deployment process in place. That flexibility is the main reason I would treat it as a Framer alternative for portability rather than just a downloader.
Here is the simple way to think about it:
- Host through ExFlow if you want the fastest path from export to live site.
- Use Git sync if your team reviews changes in pull requests or deploys from a repository.
- Use S3 if you want a static hosting setup with object storage in front of it.
- Use FTP if you are deploying to a traditional server and already have that workflow.
That is the real value here: you can keep the Framer design, but move the hosting decision to whichever system your team already trusts.
When This Workflow Makes Sense
This approach is strongest when you want a portable copy of the site, a backup before a redesign, or a more flexible hosting setup for a site that does not need to stay tied to Framer forever. It is also useful if you are comparing a Framer exporter with a broader migration tool and want the export to stay faithful to the original pages.
If you are comparing export workflows across builders, these related guides are worth a look: How to Export a Framer Site to Static HTML Without Rebuilding It, How to Self-Host a Framer Site After Exporting It to HTML, How to Export a Webflow CMS Site to GitHub Pages Without Rebuilding It, and How to Replace Webflow Hosting With GitHub Pages Using ExFlow.
If you want to try the workflow yourself, start with one Framer URL and export a small page set first. Review the files, check the links, and then decide whether to host through ExFlow or push the bundle into your existing deployment stack. ExFlow.site is the fastest way to test that process end to end.
For a Framer site you want to keep portable, the next best step is simple: export one page, inspect the output, and confirm that the static version still feels like your real site.
Comments
Post a Comment