Introduction
In the dynamic realm of web development, Webflow stands out as a favored solution for designers looking to create visually rich websites without diving too deep into code. However, once your stunning Webflow site is ready, you might want the flexibility of hosting it elsewhere. This guide will walk you through the steps to export your Webflow site as static HTML files using ExFlow, a tool celebrated for simplifying this process.
Why Export Your Webflow Site?
Exporting your Webflow site as static HTML files offers several advantages:
- Cost Efficiency: Webflow's hosting can get pricey, especially for websites with modest bandwidth requirements.
- Flexibility: Choose your hosting provider based on your specific needs, be it cost, geographic location, or technological compatibility.
- Control: Having full access to your website's code allows easier integration with other technologies and platforms.
The Role of ExFlow
ExFlow is a valuable tool for those wishing to export Webflow and Squarespace sites as static HTML files. Here's why you should use it:
- Comprehensive Export Options: ExFlow allows you to export CSS, JavaScript, images/media, and even CMS content.
- Customizable Exports: You can tweak various settings, like removing Webflow's badge or adding custom scripts.
- Automatic Syncing: ExFlow supports syncing with popular platforms like S3, Git, and FTP, streamlining the hosting setup.

Step-by-Step Guide to Export Your Webflow Site Using ExFlow
Step 1: Set Up Your Site
- Ensure your Webflow design is complete and you're satisfied with the final look.
- Double-check links, assets, and any dynamic content for consistency and correctness.
Step 2: Visit ExFlow.site
- Head over to ExFlow.site and begin the process by entering your Webflow site's domain name.
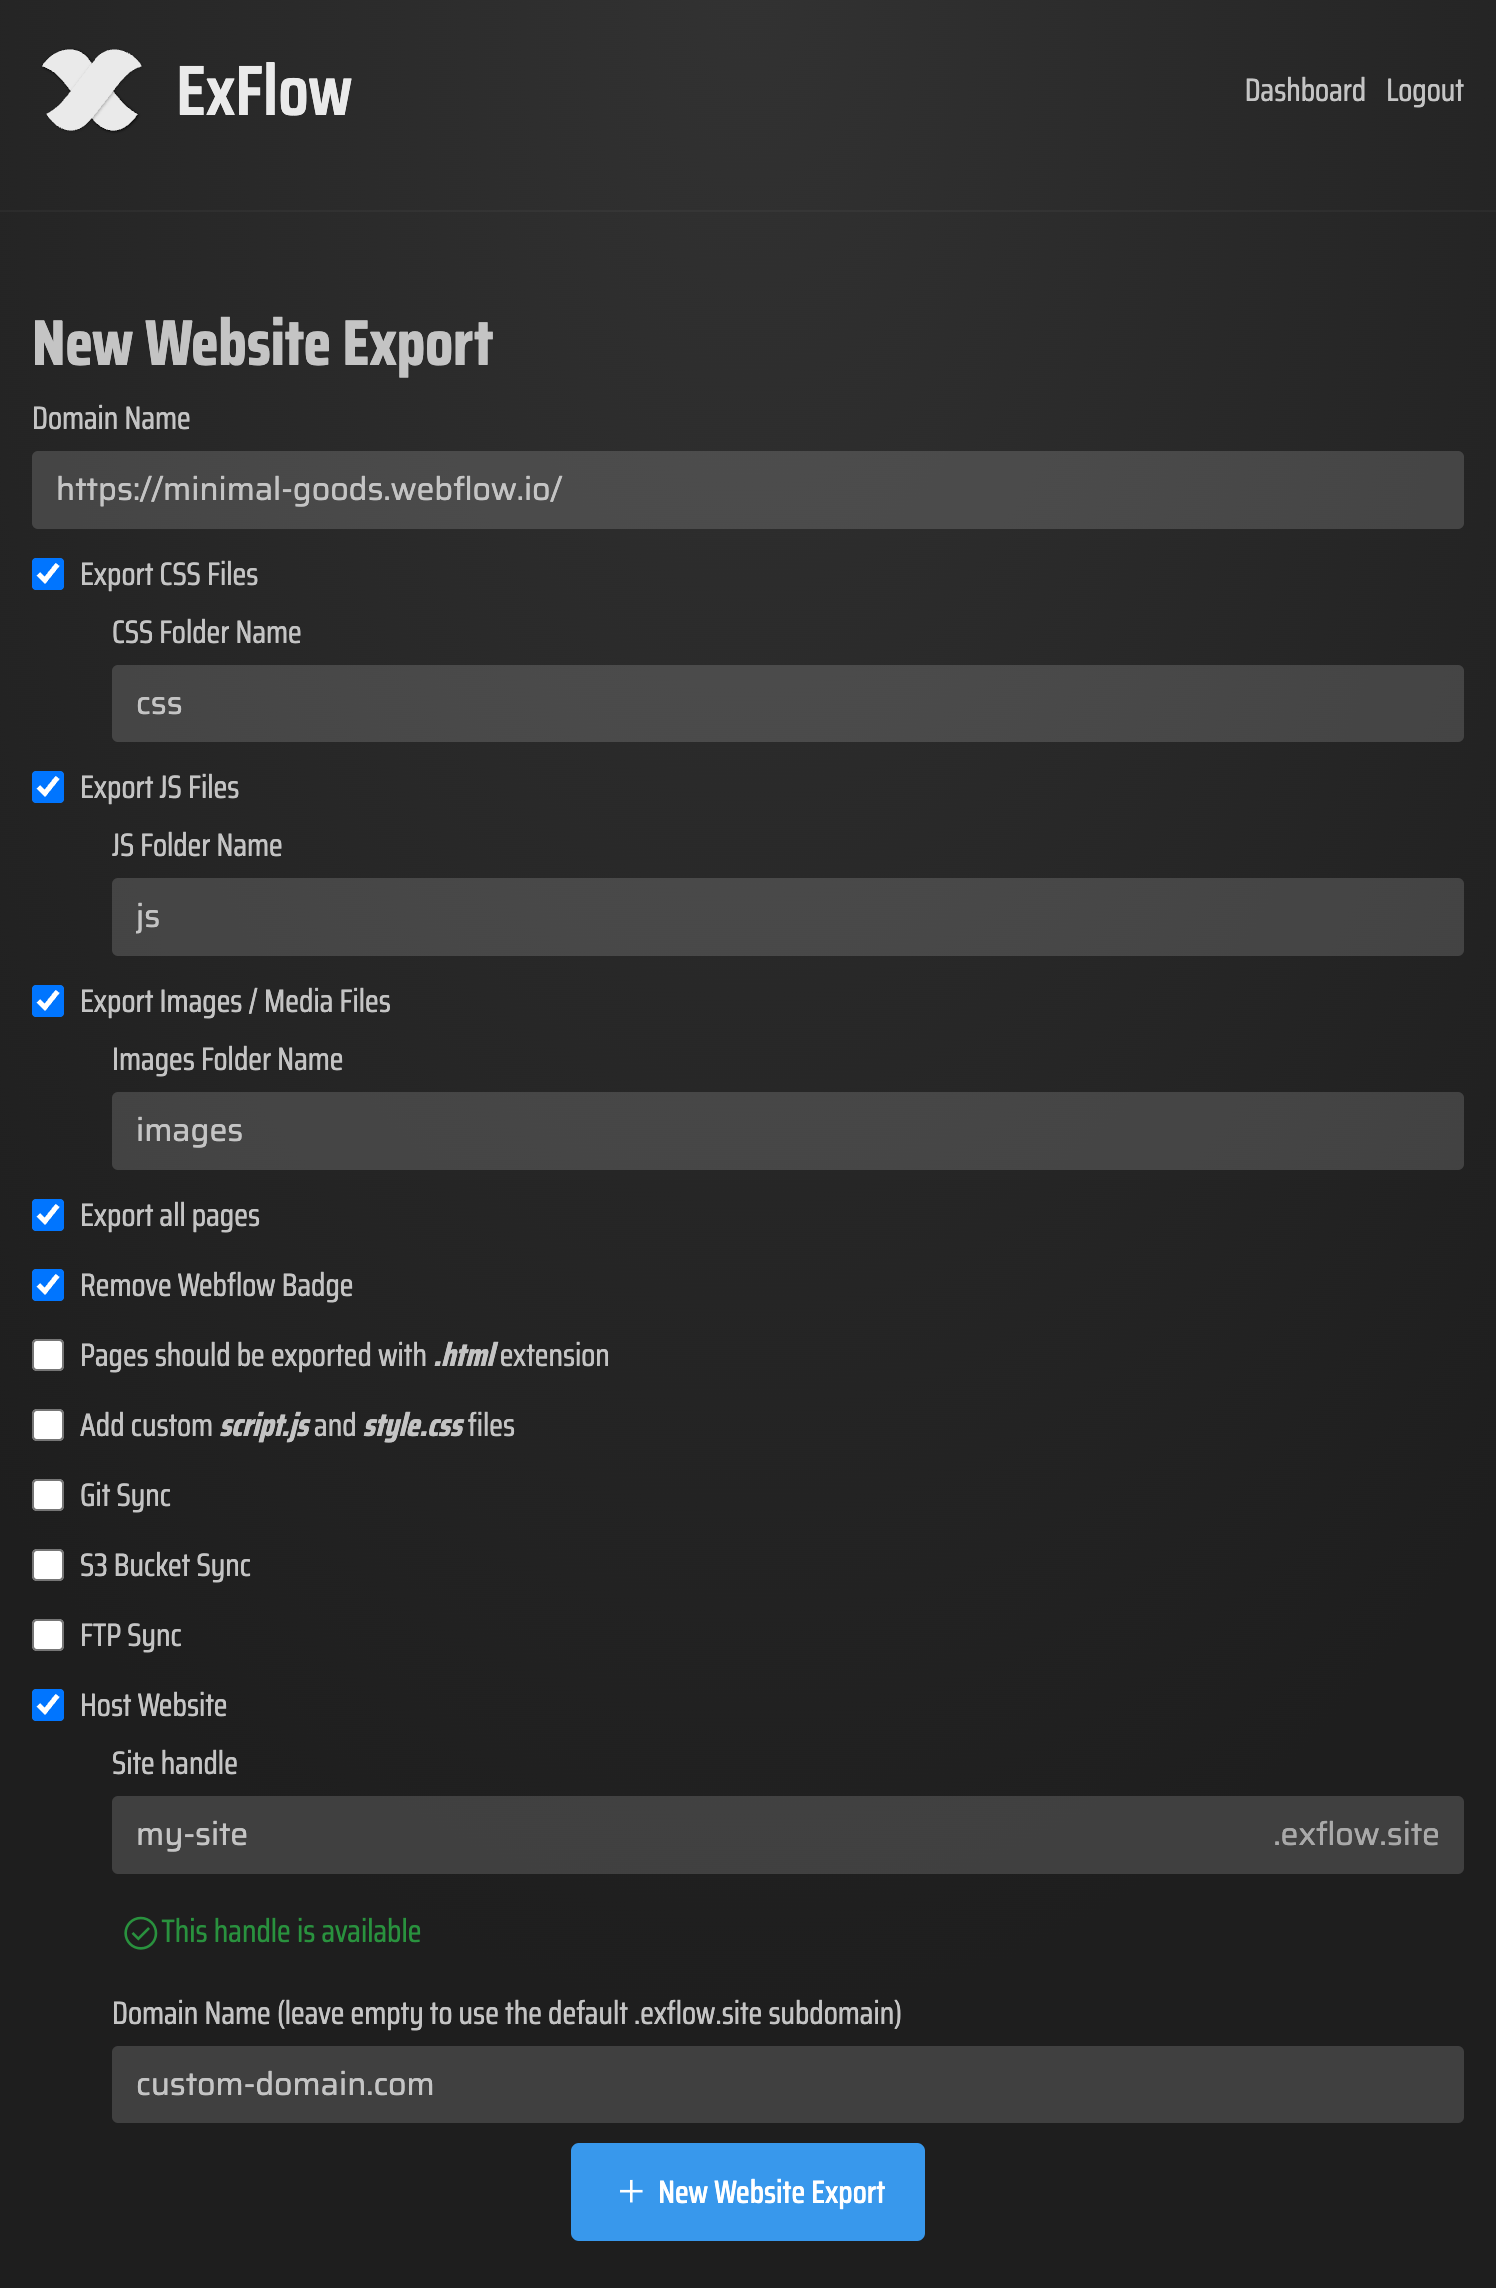
Step 3: Choose Your Export Settings
- Select Export Options: Decide which elements you want to export; CSS, JavaScript, images, and media files can all be included.
- Configure Sync Options: If you plan on using services like Git or Amazon S3, input your credentials for automated sync.
Step 4: Export All Pages
- Ensure all pages, including CMS and dynamic content, are selected for export.
- Start the export process and wait for ExFlow to gather and prepare your files.
Step 5: Download Your Exported Site
- Once the export finishes, download the zip file containing your static HTML, CSS, and JavaScript files.
Hosting Your Exported Site
Now that you have your static site files, here are a few hosting options:
ExFlow Hosting: Simplify the process by opting for ExFlow's native hosting option, complete with linking external domains.
FTP Hosting: Use an FTP client to upload your files to any web server with FTP access.
Amazon S3: Utilize AWS S3's efficient storage for hosting static sites—set the bucket to enable static site delivery.
GitHub Pages: Ideal for personal or project sites, just push your files to a GitHub repository and deploy.
Conclusion
Exporting your Webflow site allows you to take charge of your web hosting and control costs. Tools like ExFlow make this process straightforward, bringing the benefits of flexible hosting and easier integrations within reach. Whether you opt for ExFlow's hosting or another platform like GitHub or AWS, the power to host your Webflow site on your terms is just a few clicks away.
Ready to move forward? Visit ExFlow now and start your export process. Unlock the flexibility and savings that come with hosting your Webflow creations independently.
Comments
Post a Comment