Introduction
Managing content across multiple platforms can sometimes feel like an overwhelming task. But what if you could streamline your operations and eliminate the hassle of manually syncing your Notion articles with your Webflow CMS database? Meet SyncFlow, your ultimate tool for seamless synchronization.
In this guide, we'll break down how you can effortlessly publish your Notion articles to Webflow CMS using SyncFlow.
Why Use SyncFlow?
When it comes to Digital Content Management, both Notion and Webflow hold unique advantages. Notion tries to simplify document management and content creation, while Webflow offers unparalleled flexibility in website design and customization. However, the challenge lies in bridging the gap between these two tools.
SyncFlow solves this problem by enabling real-time synchronization between Notion and Webflow, allowing you to focus on content creation without the headache of formatting issues or transfer errors.
Key Features of SyncFlow
- Auto-Sync: Automatically updates your Webflow collection whenever a Notion page is created or modified.
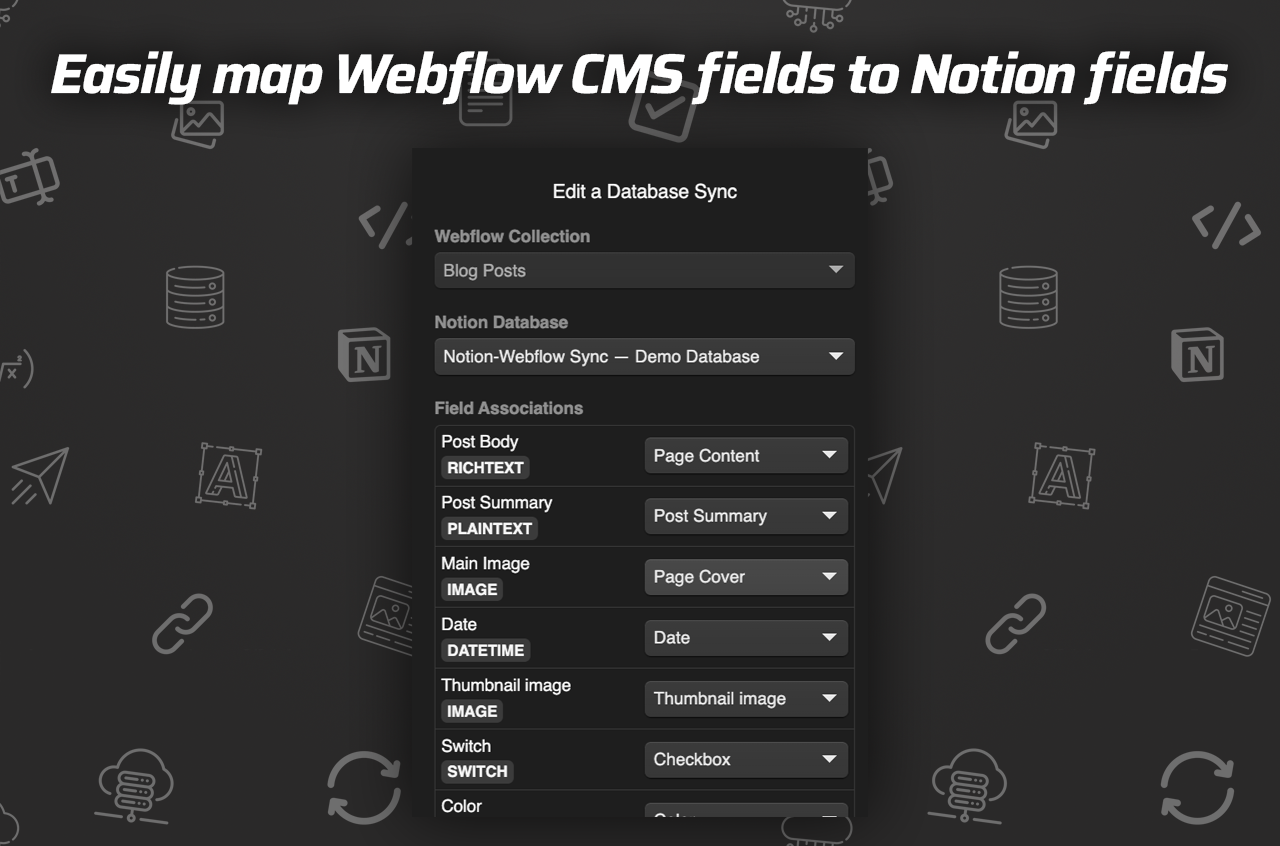
- Versatile Field Types: Supports various field types such as text, images, dates, and much more.
- Fully Customizable: Choose between inline styling or using classes for complete design control.
- Page Linking: Convert Notion page links directly into Webflow post links seamlessly.
- Code Highlighting & Math Expressions: Ideal for technical and academic content.
Getting Started with SyncFlow
Follow these simple steps to integrate SyncFlow into your workflow:
Visit SyncFlow Website: Go to SyncFlow's website and click on 'Get Started'.
Grant Access: Approve and grant SyncFlow access to your Webflow sites.
Account Setup: Sign up for a new account or log in if you already have one.
Connect to Webflow: In the Webflow designer, launch the SyncFlow app.
Connect to Notion: Click on 'Connect Notion' and select the specific Notion page or folder.
Create Sync Task: Click on 'Sync a new database'.
Select Webflow Collection: Choose the Webflow collection to sync with your Notion database.
Set Up Notion Database: Select an existing database or let SyncFlow create one.
Adjust Sync Settings: Configure settings like Auto-Publish and Auto-Sync.
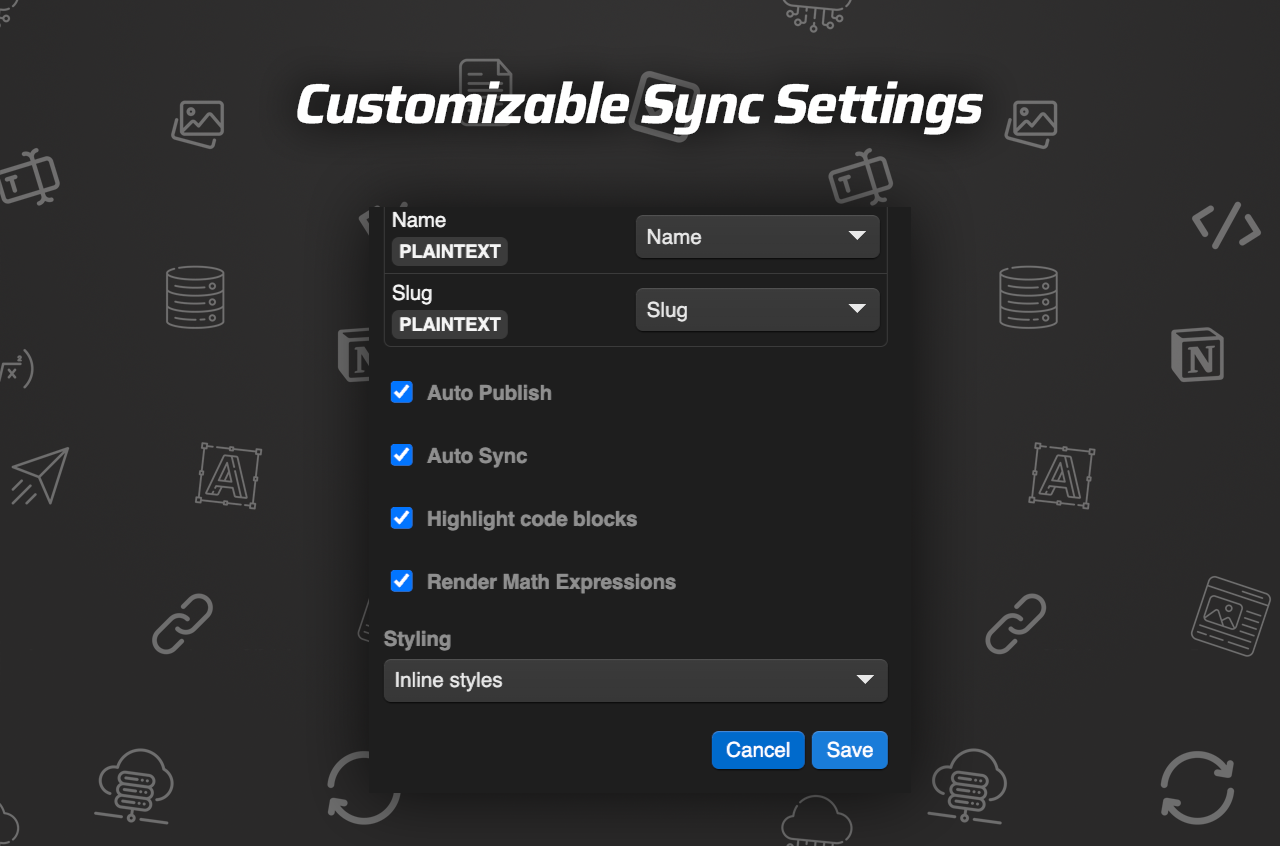
Choose Styling Option: Opt for 'Inline Styles' or 'Use Classes'.
Save Settings: Establish synchronization with your customized settings.
Verify Sync: Add a test entry in Notion and check it in your Webflow collection.
Check Webflow CMS: Refresh to view synchronized content.
Watch & Learn: Video Tutorials
For a step-by-step guide, check out these helpful resources:
Conclusion
Utilizing SyncFlow, you can turn the often-tedious task of syncing content between Notion and Webflow into a seamless process. Whether you're an individual content creator or managing a large-scale website, SyncFlow offers unparalleled efficiency, enabling you to focus more on creating engaging, quality content.
Get Started Today: Visit SyncFlow and open the gateway to hassle-free content management!

Comments
Post a Comment