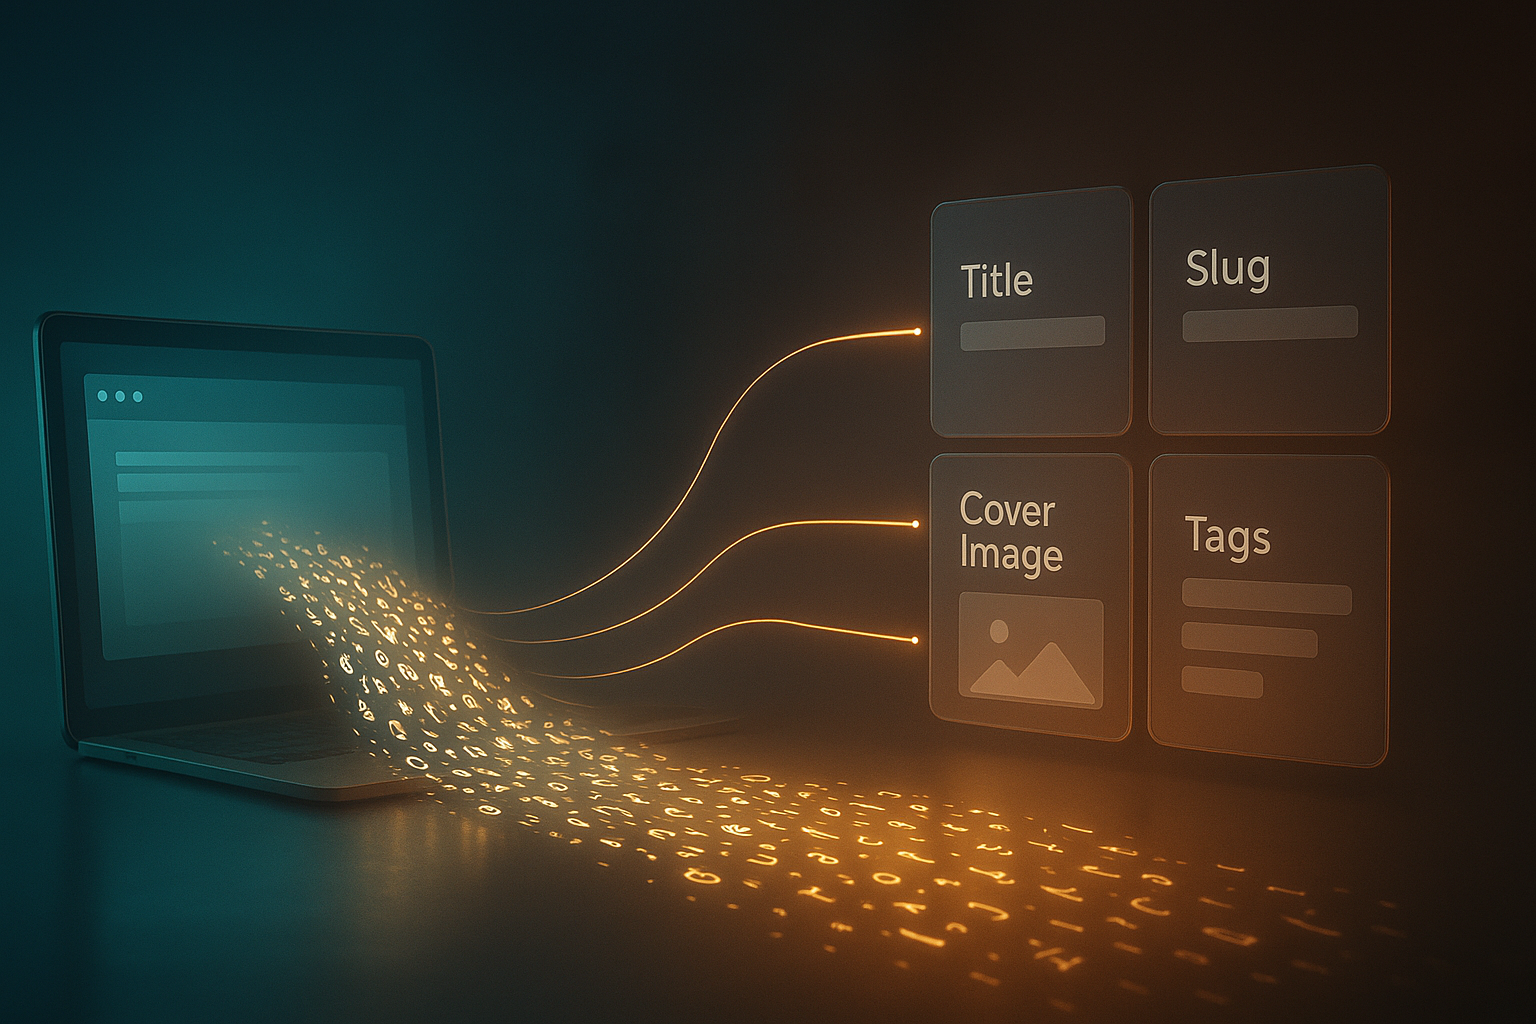
If you’re tired of copying and pasting blog posts, landing page content, or case studies from Notion into Webflow, there’s a better way. You can sync Notion pages directly with your Webflow CMS, automate publishing, and keep everything perfectly up-to-date—without tedious manual work.
In this guide, you’ll learn how to sync Notion with Webflow CMS using SyncFlow, a streamlined app designed for creators, marketers, and teams who write in Notion and design in Webflow.
Ready to skip the manual copy/paste? Get started with SyncFlow now: https://syncflow.ybouane.com/
Why automate your Notion → Webflow workflow?
- Save hours each week by eliminating manual copy/paste
- Reduce formatting errors and broken links
- Keep content always fresh with auto-sync and auto-publish
- Maintain a single source of truth in Notion
- Scale your editorial workflow as your site grows
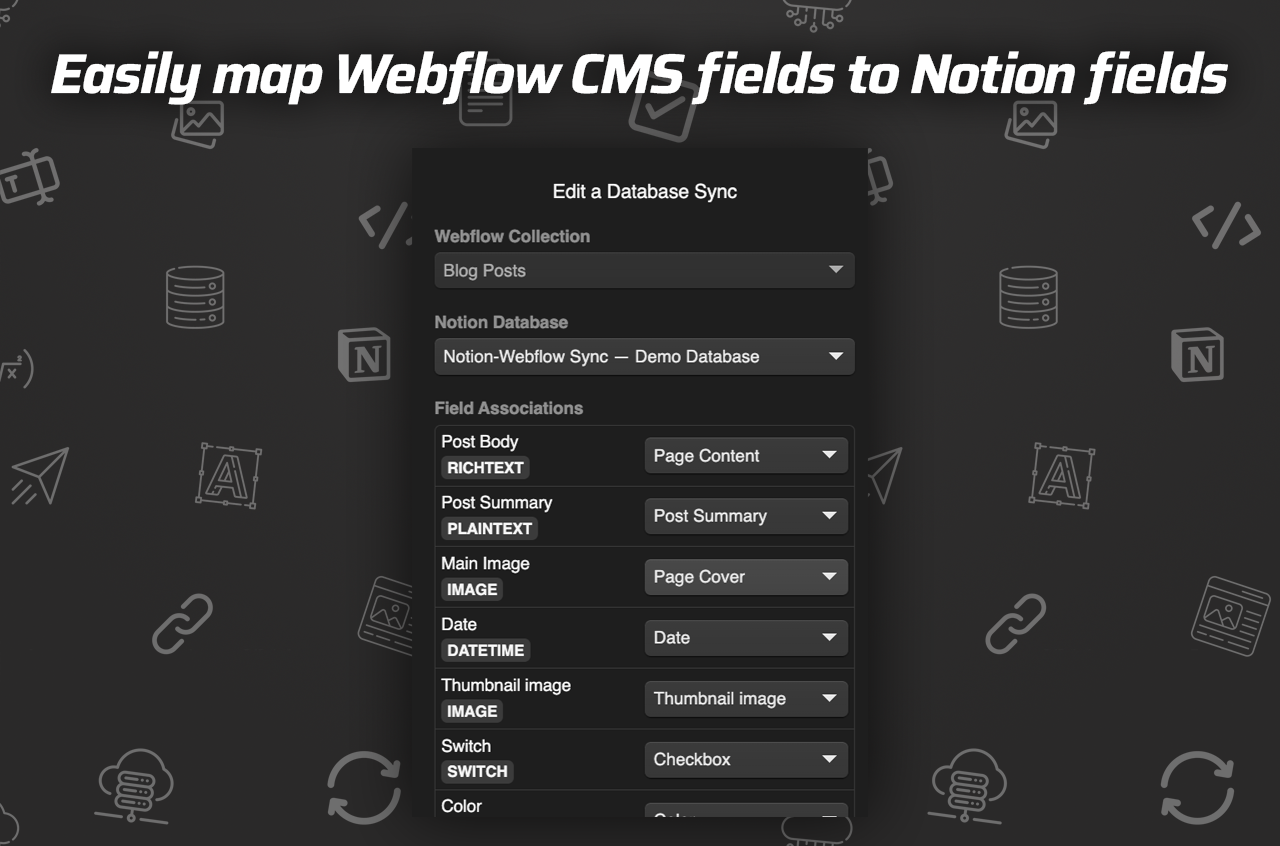
What is SyncFlow (and why it’s the easiest way to do this) SyncFlow is a Notion–Webflow sync app that connects a Notion database to a Webflow CMS Collection. It maps fields, syncs content automatically, and even supports code highlighting and TeX for technical or academic posts.
Explore SyncFlow: https://syncflow.ybouane.com/
Key features at a glance
- Auto-Sync: When a Notion page updates, your Webflow CMS updates automatically.
- Auto-Publish: Push changes live without manual intervention.
- Versatile field types: Text, images, dates, checkboxes, URLs, and more.
- Page Linking: Notion page links become internal links between Webflow posts.
- Code Highlighting: Beautiful code formatting for developer blogs.
- TeX Support: Render math expressions cleanly in Webflow.
- Styling options: Import inline styling or use Webflow classes for full design control.
How to sync Notion pages with Webflow CMS (step-by-step) Follow this exact process to set up your Notion-to-Webflow pipeline in minutes.
1) Visit SyncFlow and click Get Started Go to https://syncflow.ybouane.com/ and hit Get Started. Create an account or log in.
2) Grant access to Webflow Authorize SyncFlow to access your Webflow sites so it can manage your CMS collections.
3) Launch the SyncFlow app in Webflow Open Webflow Designer, launch the SyncFlow app, and select the site you want to sync.
4) Connect Notion In the SyncFlow app, click Connect Notion and choose the Notion page or folder you’ll use. Select an existing database or let SyncFlow help create one.
5) Create a Sync Task Click Sync a new database in SyncFlow. This creates a connection between one Notion database and one Webflow CMS Collection.
6) Choose the Webflow Collection Select the Webflow CMS Collection (e.g., Blog Posts, Case Studies) you want to populate from Notion.
7) Set up or select the Notion database
- Use an existing Notion database if you already have one.
- Or create a new database—SyncFlow can help set up the necessary fields.
8) Map fields (Notion → Webflow) Match Notion properties to Webflow fields like Title, Slug, Main Image, Summary, Rich Text Content, Tags, Author, Publish Date, and more.
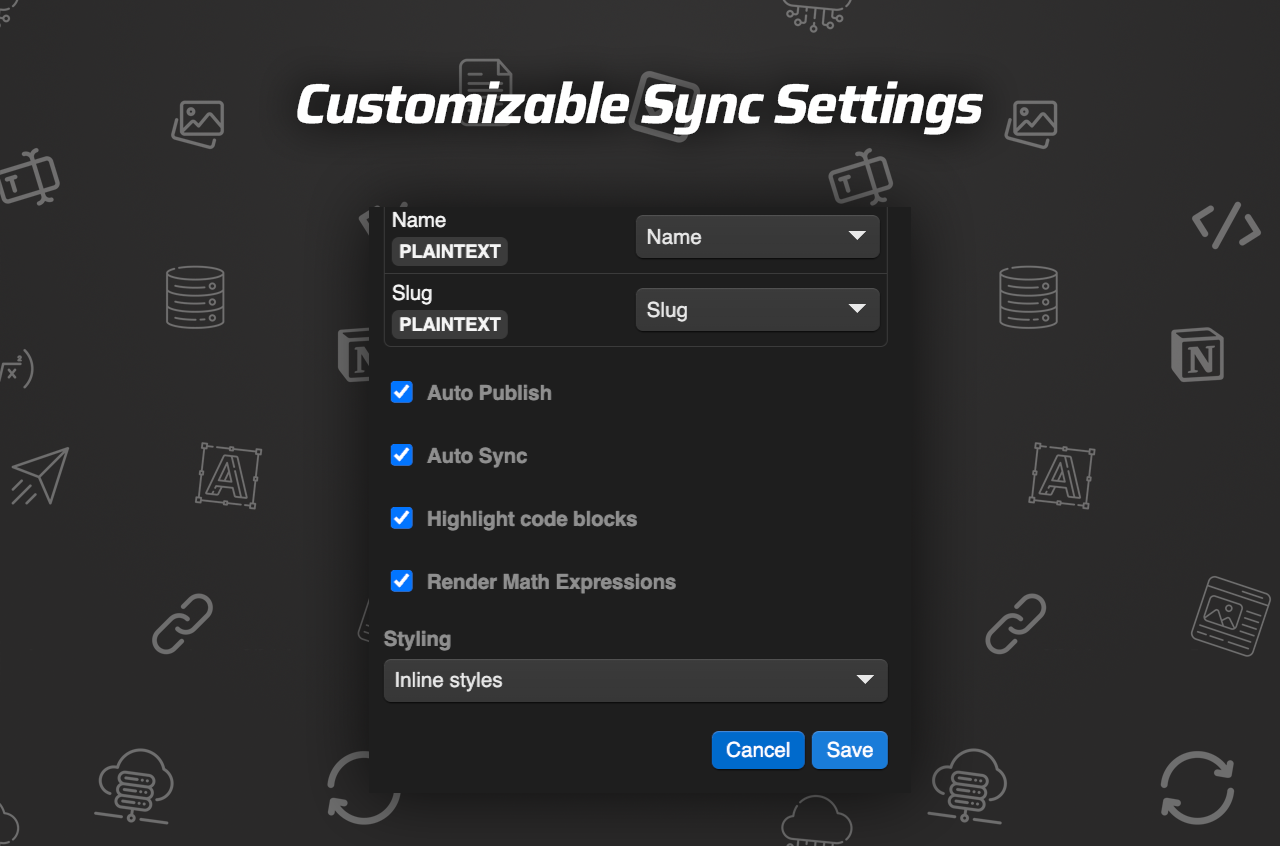
9) Configure sync settings Choose how your content behaves during and after syncing:
- Auto-Sync: Always keep Notion and Webflow aligned in near real-time.
- Auto-Publish: Push updates live immediately.
- Code Highlighting: Great for developer documentation and technical blogs.
- TeX Rendering: Perfect for math-heavy or academic content.
- Styling: Import inline styles from Notion or use Webflow classes for design control.
10) Save settings and sync Save your configuration. You can trigger a manual sync to test and confirm everything’s working.
11) Verify in Webflow CMS Open your Webflow CMS collection. After a short moment, you’ll see items created or updated from Notion—complete with images, tags, and body content.
12) Optional: Full-resync If you need to align an existing collection fully, run a full-resync to ensure parity between the Notion database and the Webflow CMS.
Prefer video? Watch the tutorials
- Full walkthrough: https://www.youtube.com/watch?v=_890vYoe3KQ
- Quick trailer overview: https://www.youtube.com/watch?v=HGjBCLL3anc
SEO tips for a clean Notion → Webflow pipeline To rank higher and publish consistently, bake SEO into your workflow:
- Titles and H1s: Map your Notion Title to Webflow’s Name and H1. Keep titles clear and keyword-rich (e.g., Sync Notion With Webflow CMS, Notion to Webflow Automation).
- Slugs: Create a Notion property for your slug (e.g., sync-notion-to-webflow) and map it to Webflow’s slug field.
- Meta fields: Add Notion properties for Meta Title and Meta Description so every post ships with optimized metadata.
- Cover image and alt text: Map a Notion Cover Image property and include a text field for Image Alt Text.
- Internal linking: Use Notion page links—SyncFlow converts them into internal Webflow links between posts.
- Structured content: Use headings, bulleted lists, callouts, and code blocks (with highlighting) for scannability and engagement.
Pro tips from power users
- Use classes for styling: Select Use Classes in SyncFlow to style imported content consistently inside Webflow Designer.
- Standardize your database: Create a Notion template for blog posts that includes fields for slug, summary, tags, author, cover image, and SEO metadata.
- Batch publish: Draft multiple posts in Notion, then publish on a schedule using Auto-Publish or manual control.
- Developer docs: Turn on Code Highlighting to ensure code looks beautiful without extra formatting in Webflow.
- Academic posts: Enable TeX for equations and formulas that render cleanly in Webflow.
Troubleshooting common issues
- Content isn’t appearing: Double-check that the Notion database is correctly connected and that Auto-Sync is enabled. Trigger a manual sync to confirm.
- Images not showing: Ensure your Notion image field is mapped to a Webflow Image field and that the images are accessible.
- Slug conflicts: If a slug already exists in Webflow, adjust it in Notion and re-sync.
- Styling looks off: Switch from Inline Styles to Use Classes and style your rich text elements directly in Webflow.
- Out-of-date items: Use the full-resync option to reconcile your database with the CMS.
Who benefits most from SyncFlow
- Content teams who draft in Notion but publish in Webflow
- Solo creators and marketers who want a faster blog workflow
- Dev and data teams documenting processes with code blocks
- Educators and researchers publishing math-heavy content using TeX
Pricing: simple and scalable The Standard plan is just $8/month with 1 Webflow site install, unlimited syncs, unlimited databases, and unlimited connected fields. See details and get started here: https://syncflow.ybouane.com/
Why this beats manual copying (every time)
- Consistency: One source of truth in Notion—no more mismatched content versions.
- Speed: Draft, edit, and publish in minutes, not hours.
- Reliability: Prevent human errors and formatting issues.
- Scale: As your library grows, the sync remains smooth and predictable.
Next steps
- Try SyncFlow free: https://syncflow.ybouane.com/
- Follow the steps above to connect your Notion database and Webflow CMS.
- Configure Auto-Sync and Auto-Publish to keep your site always fresh.
Stop copying and start syncing. Write where you think best (Notion) and publish where you design best (Webflow)—all with SyncFlow.
Comments
Post a Comment