If your Shopify product photos are technically fine but still not helping conversions, the problem is usually not the camera. It is the workflow.
Supra AI Photo Studio is a practical way to turn one clean source image into the visual set a store actually needs: a product page hero, a lifestyle version, a try-on or on-model variation, and a few ad-ready assets that feel like they belong to the same brand.
If you want to see the product itself first, start with the Shopify App Store listing and the landing page. The demo trailer is also worth a quick look if you want to understand the flow before installing.
What this workflow should produce
A good product-image system should give you:
- cleaner product-page images
- lifestyle shots with useful context
- on-model or try-on visuals when the product needs them
- short video assets for ads and social
- a repeatable way to keep the catalog consistent
That is the part a lot of stores miss. They create one nice hero image, then the next SKU gets a completely different look, different lighting, and a different amount of polish. The result is a catalog that feels assembled instead of designed.
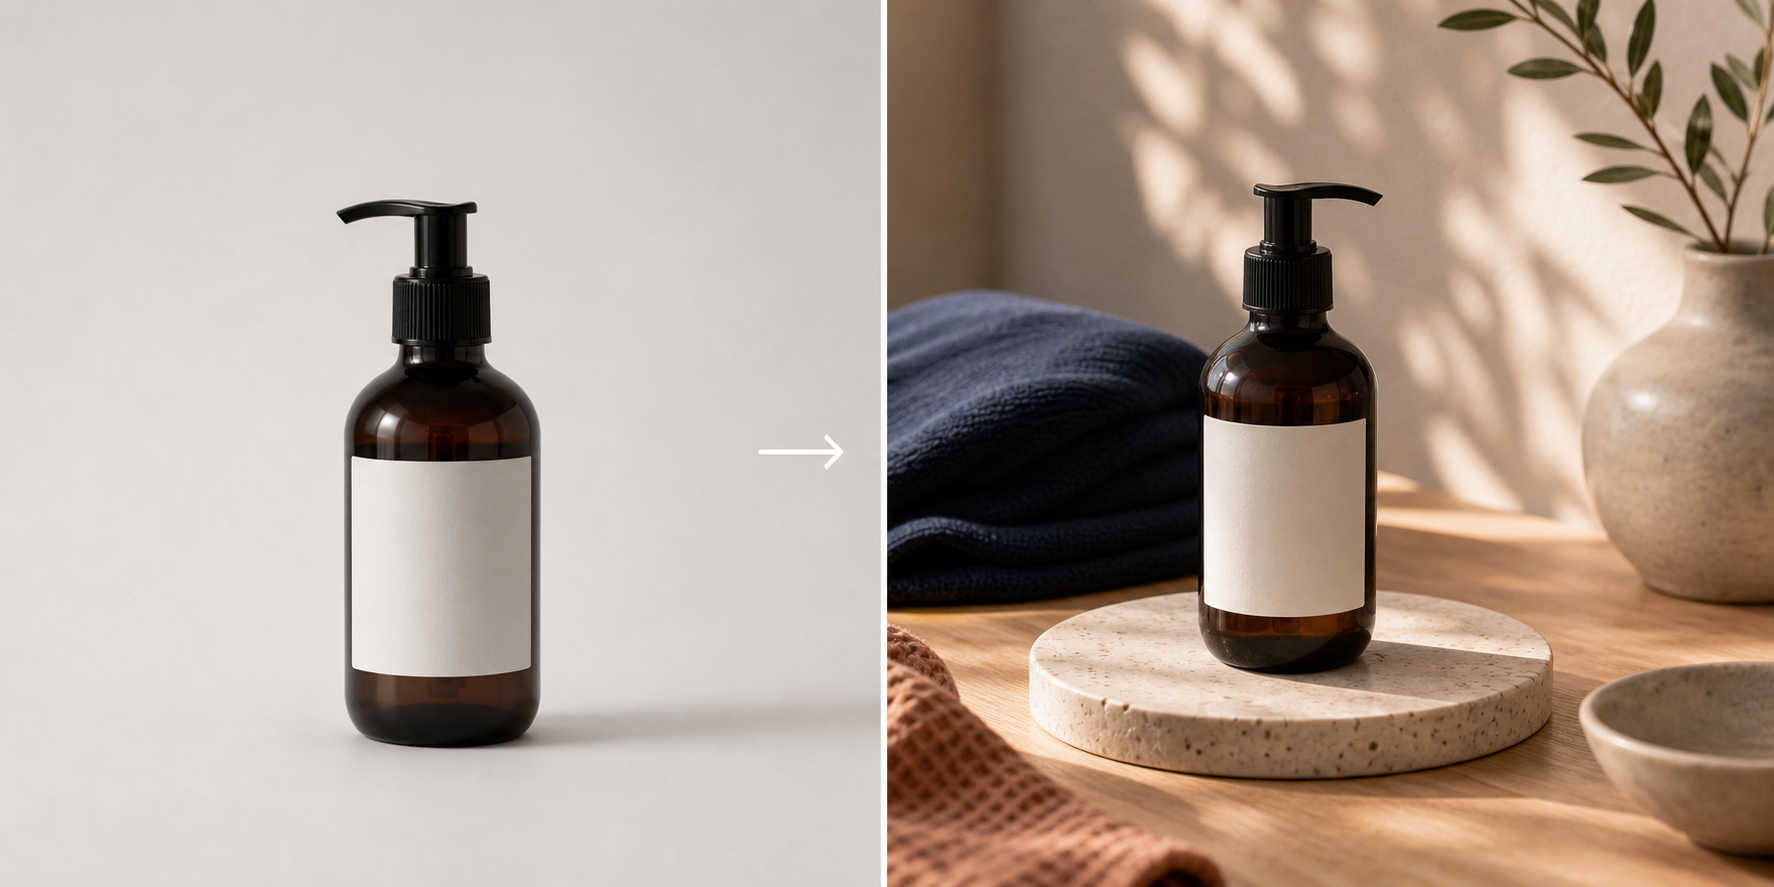
1. Start With One Clean Source Image
Use the best source file you already have. If it is blurry, dark, or busy, fix that before you do anything else. The product docs call out background removal, upscaling, and auto-enhance for exactly this reason: the cleaner the starting image, the better every downstream variation tends to look.
I have seen teams jump straight into lifestyle scenes and wonder why the output looks off. Usually the issue is not the scene. It is the source image.
If you want the asset-level version of this idea, the earlier post How to Turn One Product Photo Into a Full Shopify Image Set walks through the same first step from a different angle.
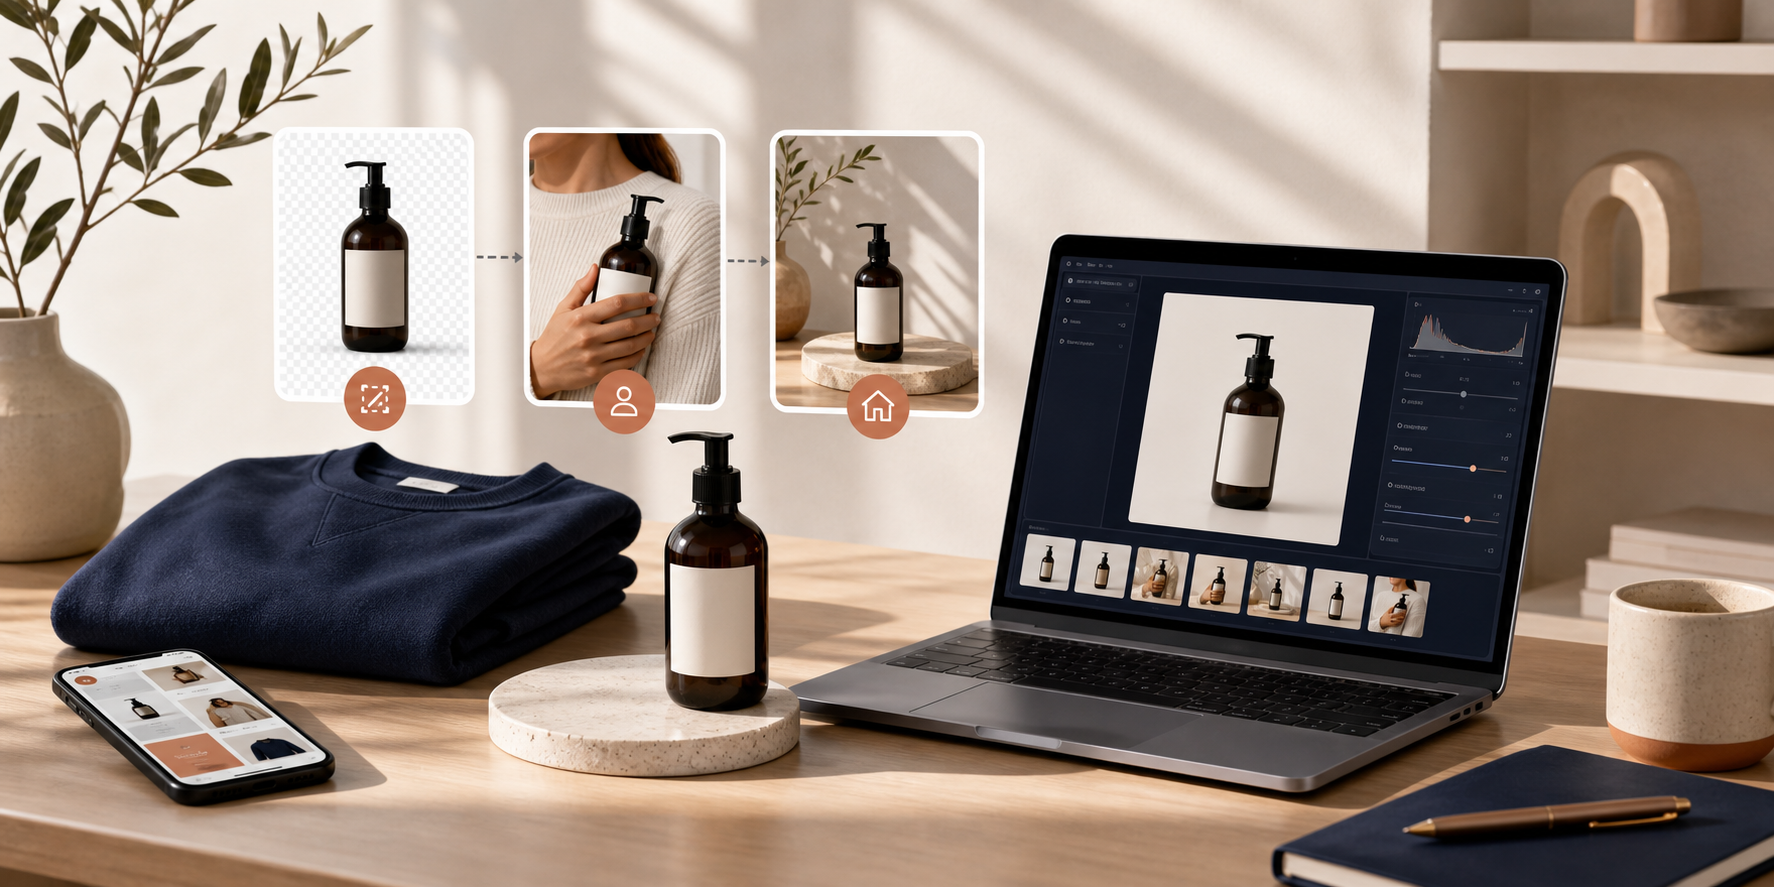
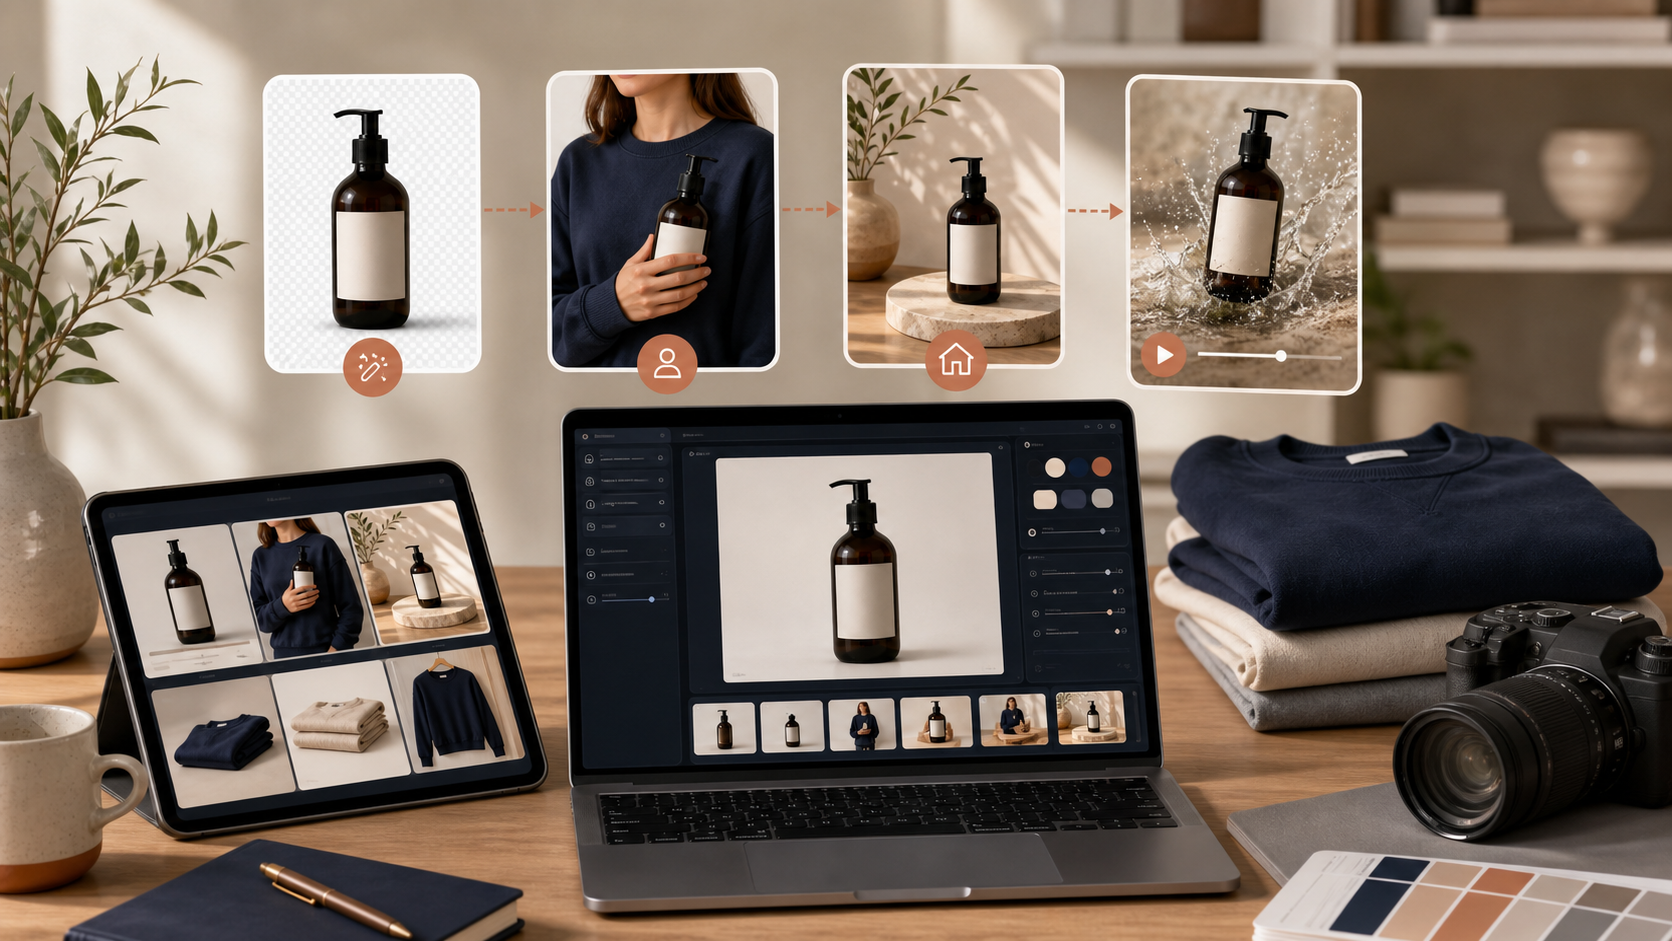
2. Create The Four Outputs Your Store Actually Uses
Once the source image is clean, build the same four outputs every time:
- a standard product image for the listing
- a lifestyle version for context
- a try-on or model version when the product benefits from fit or scale
- a short video or b-roll asset for paid and organic promotion
That is the difference between editing a photo and building a visual system.
The earlier post How I Built a Shopify Visual System From One Product Photo takes the same idea one level further and shows why consistency matters once you start adding SKUs.
3. Use The Editor Like A Production Board
The app’s editor is laid out the way a merchant actually works: tools on the left, canvas on the right, and the image gallery along the bottom. That sounds simple, but it matters because you can move from cleanup to variation without leaving the product context.
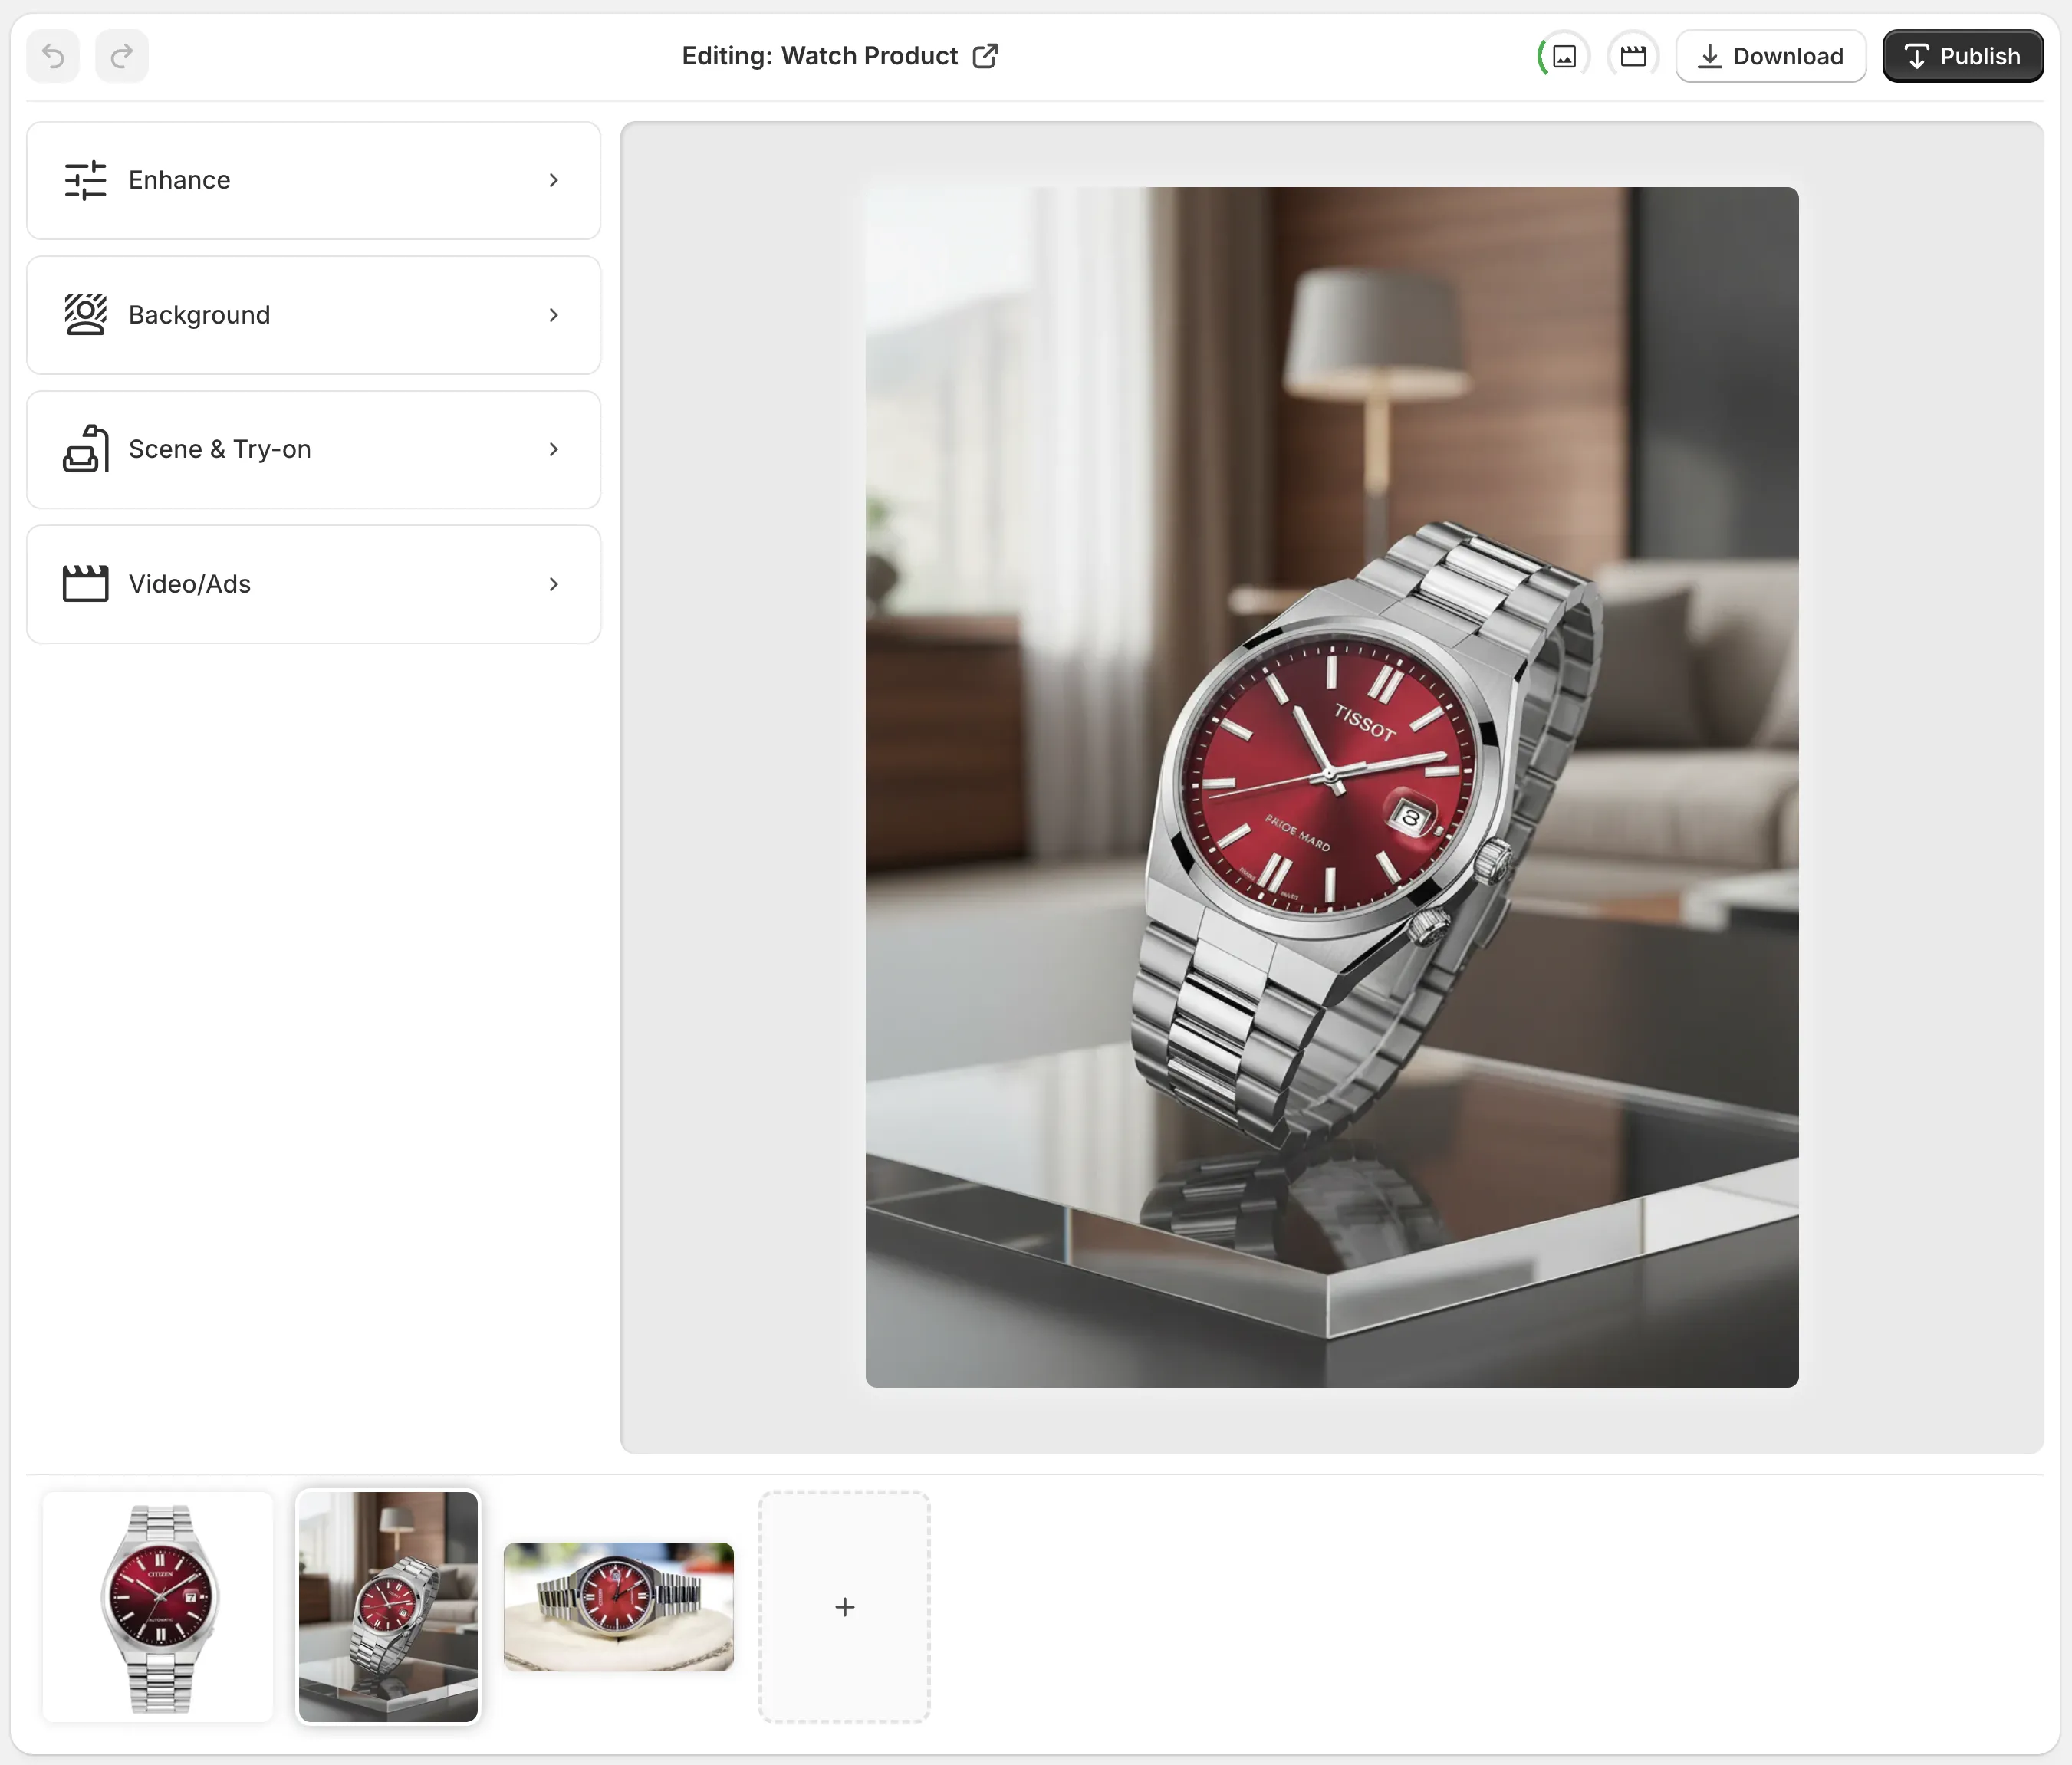
The workflow I would use is:
- remove or replace the background first
- adjust color, sharpness, and lighting second
- generate a lifestyle or try-on version third
- compare outputs in the gallery before deciding which version should ship
That sequence keeps you from polishing the wrong image. It also makes it easier to tell when a generated scene is helping the product versus distracting from it.
If you want a more step-by-step version of this kind of repeatable setup, How to Build a Repeatable Shopify Image Workflow From One Product Shot is a useful companion.
4. Match The Output To The Job
Not every image needs to do the same work.
For fashion products, the try-on flow is the most obvious win because it helps shoppers picture fit and styling. Supra AI Photo Studio says you can choose and create your own models, which makes the feature more flexible than a one-size-fits-all stock template.

For home goods, beauty, and accessories, object placement is often the better path. You can take the same base image and move it into a kitchen, a boutique, an office, or an outdoor setting without rebuilding the whole shot from scratch.

That is also where the earlier workflow posts fit in naturally. How I Cut Product Photo Prep Time for Shopify Without Hiring a Designer is especially relevant if your bottleneck is time rather than taste.
5. Add Video After The Still Image System Is Stable
Supra AI Photo Studio also supports UGC videos and b-roll videos. I would treat that as the next layer, not the first one.
First get the stills right. Then use the strongest still image as the basis for a short video variation. That keeps the look consistent across product pages, ads, and social, which is more useful than generating a random visual every time you need a clip.
The product is a good fit for stores that want to stay inside one workflow instead of bouncing between tools for cleanup, mockups, try-ons, and video.
6. Keep A Simple QA Checklist
Before you publish any image, ask five questions:
- Does the product still look accurate?
- Does the lighting feel believable?
- Are the colors close to the real item?
- Does this image solve a specific job?
- Would this asset improve the listing, ad, or social post?
If the answer is no to any of those, keep iterating.
That is the point of this kind of system. You are not trying to make one perfect image. You are trying to make a repeatable set of assets that you can keep using as the catalog grows.
The Short Version
If you already have decent product photography, you do not need to rebuild your entire process. Start with one clean image, create the small set of outputs your store actually uses, and keep the workflow consistent from SKU to SKU.
If you want to go deeper on the system side, the related posts How I Built a Shopify Visual System From One Product Photo, How to Build a Repeatable Shopify Image Workflow From One Product Shot, and How I Cut Product Photo Prep Time for Shopify Without Hiring a Designer show the same idea from different angles.
Next step: pick one SKU, clean up the source image, and create the first four outputs inside Supra AI Photo Studio: a clean product image, a lifestyle scene, a try-on or model variation, and one short video asset.
Comments
Post a Comment